반응형

Chatgpt 열풍이 부는 가운데,


갑자기 혜성처럼 등장해 `오픈 소스`를 자칭하는 딥시크.


그리고 우리가 먼저 했다도르 수상 엑사원 3.5


웹 운영도 하지 않는 엑사원의 성능이 상당히 궁금해졌다. (할 수도 있는데 안 찾아봄)


한국어로 엑사원 3.5를 검색해 봤는데, 놀랍게도 기사만 2페이지 이상 나오고 깃허브 페이지 등은 방문률이 처참한지 검색 엔진이 저 뒤로 밀어버린 모양이다.


아무튼 영어로 EXAONE 3.5 검색해서 깃허브 페이지로 들어간다.

(허깅페이스 라는 곳도 있다고 하는데, AI를 주로 하는게 아니라 잘 모르겠다.)


GitHub - LG-AI-EXAONE/EXAONE-3.5: Official repository for EXAONE 3.5 built by LG AI Research


GitHub - LG-AI-EXAONE/EXAONE-3.5: Official repository for EXAONE 3.5 built by LG AI Research

Official repository for EXAONE 3.5 built by LG AI Research - LG-AI-EXAONE/EXAONE-3.5

github.com


퀵스타트를 가져와 한 번 보도록 하자

import torch
from transformers import AutoModelForCausalLM, AutoTokenizer

model_name = "LGAI-EXAONE/EXAONE-3.5-7.8B-Instruct"

model = AutoModelForCausalLM.from_pretrained(
    model_name,
    torch_dtype=torch.bfloat16,
    trust_remote_code=True,
    device_map="auto"
)
tokenizer = AutoTokenizer.from_pretrained(model_name)

# Choose your prompt
prompt = "Explain how wonderful you are"  # English example
prompt = "스스로를 자랑해 봐"       # Korean example

messages = [
    {"role": "system", "content": "You are EXAONE model from LG AI Research, a helpful assistant."},
    {"role": "user", "content": prompt}
]
input_ids = tokenizer.apply_chat_template(
    messages,
    tokenize=True,
    add_generation_prompt=True,
    return_tensors="pt"
)

output = model.generate(
    input_ids.to("cuda"),
    eos_token_id=tokenizer.eos_token_id,
    max_new_tokens=128,
    do_sample=False,
)
print(tokenizer.decode(output[0]))

pretrained 모델을 다운받아 사용하는 형식일 것 같고, 


model name 의 매개변수는 3개 중에 선택 가능하다고 한다


뭐.. gpt api 를 쓸 때랑 크게 다르지 않다

근데 온디바이스 모델은 2.4B parameter를 감당 가능하다고 해도 IoT 임베디드 환경에서 쓸 모델은 없나,, 생각하게 된다


한 번 실행을 해 보자.

내 실행환경은 anaconda, Python 3.11.7, i7-12700, rtx 3070을 사용 중이다.

코드 중에 to("cuda")가 있는데 Nvidia 계열 gpu가 아닌 경우에 그냥 cpu로 맞춰주면 될 것 같다

(런타임은 얼마나 걸릴지 장담 못한다)


> 여러 패키지가 이미 설치된 환경이기 때문에 나는 단 2개의 종속 패키지들만 설치했다

> accelerate==0.26.0

> transformers==4.43.0


실행하게 되면 다운로드를 쭉 받는다 (모델 구조가 어떻게 되어 있는지는 모르겠지만 DNN 구조라 parameter가 많은 듯 하다)


로컬에서 돌리면 메모리를 상당 부분 차지한다.

메모리 32gb 이상 환경에서 돌리는 것이 권장되나 보다


내 환경에서는 첫 시작에 15분 30초가 소요되었다.(다운로드 포함)


이후 2번째 실행에서는 gpu를 열심히 갈궈서 2분 30초만에 실행이 완료되었다.


그래도 rtx3070인데.. 파라미터 2.4B 짜리로 교체해보자.

model_name 을 교체해 준다.

model_name = "LGAI-EXAONE/EXAONE-3.5-2.4B-Instruct"


그런데도 가중치 값에 추가적인 값들이 들어간 텐서 파일이 5기가를 차지한다

확실히 LLM이 용량 압박이 거세다


처음 실행은 못 찍었는데, 2분대로 걸렸다.(다운로드 포함)


이후 실행에서는 좀 쓸 만한 정도까지 된 듯 하다(15초 소요)

근데 다른 프롬포트 넣어서 하니까(한글) 50초까지도 소요되는 걸 보면 PC 성능 문젠가 싶기도 하고..

2.4B 모델은 챗봇으로 사용하기도 나쁘지 않은 듯 하다(RTX 3070, 32gb ram 급 PC 로컬에서)


양자화(Quantization)된 모델의 경우에도 속도는 상당히 빠를 것 같은데 그거까지 하고싶지는 않다


근데 깃허브 밑에 다 설명하니까 그냥 보고 하면 될 듯 함


흠......


지우는 방법(아나콘다)


여기 다 들어있으니까 알아서 삭제하면 된다

일반 파이썬이면 또 파이썬 캐시파일로 잡혀서 들어가는지는 모르겠는데 경로 따라 가면 있을 듯


맛보기 끝

반응형
반응형

Goal : Faster R-CNN 이 어떻게 동작하는지 코드로 한 번 알아보고자 함. 전문적인 내용은 담지 않고 있으니 정확한 정보가 필요하다면 논문을 참고하길 바람.


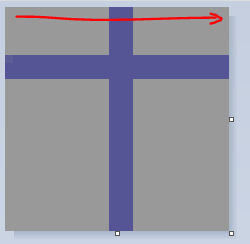
다음은 가장 기본적인 Faster R-CNN 구조이다. 챗봇한테 짜 달라고 해도 코드를 생성해 준다.

import torch
import torchvision
from torchvision.models.detection import FasterRCNN
from torchvision.models.detection.rpn import AnchorGenerator

def create_faster_rcnn(num_classes):
    # 백본 모델로 ResNet-50을 사용
    backbone = torchvision.models.resnet50(pretrained=True)
    
    # ResNet의 마지막 두 스테이지만 사용
    backbone = torch.nn.Sequential(*list(backbone.children())[:-3])
    
    # RPN에서 사용할 앵커 생성기 정의
    anchor_generator = AnchorGenerator(
        sizes=((32, 64, 128, 256, 512),),
        aspect_ratios=((0.5, 1.0, 2.0),)
    )
    
    # ROI Pooling 레이어 정의
    roi_pooler = torchvision.ops.MultiScaleRoIAlign(
        featmap_names=['0'],
        output_size=7,
        sampling_ratio=2
    )
    
    # Faster R-CNN 모델 생성
    model = FasterRCNN(
        backbone,
        num_classes=num_classes,
        rpn_anchor_generator=anchor_generator,
        box_roi_pool=roi_pooler
    )
    
    return model

# 사용 예시
num_classes = 91  # COCO 데이터셋의 클래스 수 (배경 클래스 포함)
model = create_faster_rcnn(num_classes)


model 을 주목해 보면, FasterRCNN 클래스에 속성들을 집어 넣고 있는게 보인다.

항목으로는,

1. 백본

2. num_classes

3. rpn_anchor_generator

4. box_roi_pool

의 4 가지로 구성되어 있는 것을 확인 가능하다.


여기서 num_classes 는 CNN 을 거쳤을 때의 결과 클래스 + 배경 클래스 1을 합친 값이 된다. 따라서 이건 제외하도록 하고

백본, rpn_anchor_generator, box_roi_pool 의 세 가지를 분석해 보도록 한다.


과정을 크게 살펴 보자.


백본의 경우 input image 에서 feature map 을 생성하는 과정이다. 

rpn_anchor_generator 의 경우 객체가 있을 만한 곳을 제안하는 데 사용되는 앵커 박스를 생성하는 역할을 한다.

또한 앵커들을 가지고 rpn 이 객체가 있을 만한 영역을 제안한다.

box_roi_pool 은 이 제안된 영역에서 고정 크기의 특징을 추출한다.

추출한 특징은 객체 분류 및 바운딩 박스 생성에 사용된다.


Faster R-CNN 클래스 내부를 한번 보도록 한다.(faster_rcnn.py)

내부 argument 로 사용하는 것들을 적어놓았다.

Args:
        backbone (nn.Module): the network used to compute the features for the model.
            It should contain an out_channels attribute, which indicates the number of output
            channels that each feature map has (and it should be the same for all feature maps).
            The backbone should return a single Tensor or and OrderedDict[Tensor].
 
        num_classes (int): number of output classes of the model (including the background).
            If box_predictor is specified, num_classes should be None.
 
        min_size (int): minimum size of the image to be rescaled before feeding it to the backbone
 
        max_size (int): maximum size of the image to be rescaled before feeding it to the backbone
 
        image_mean (Tuple[float, float, float]): mean values used for input normalization.
            They are generally the mean values of the dataset on which the backbone has been trained
            on
 
        image_std (Tuple[float, float, float]): std values used for input normalization.
            They are generally the std values of the dataset on which the backbone has been trained on
        rpn_anchor_generator (AnchorGenerator): module that generates the anchors for a set of feature
            maps.
 
        rpn_head (nn.Module): module that computes the objectness and regression deltas from the RPN
 
        rpn_pre_nms_top_n_train (int): number of proposals to keep before applying NMS during training
 
        rpn_pre_nms_top_n_test (int): number of proposals to keep before applying NMS during testing
 
        rpn_post_nms_top_n_train (int): number of proposals to keep after applying NMS during training
 
        rpn_post_nms_top_n_test (int): number of proposals to keep after applying NMS during testing
 
        rpn_nms_thresh (float): NMS threshold used for postprocessing the RPN proposals
 
        rpn_fg_iou_thresh (float): minimum IoU between the anchor and the GT box so that they can be
            considered as positive during training of the RPN.
 
        rpn_bg_iou_thresh (float): maximum IoU between the anchor and the GT box so that they can be
            considered as negative during training of the RPN.
 
        rpn_batch_size_per_image (int): number of anchors that are sampled during training of the RPN
            for computing the loss
 
        rpn_positive_fraction (float): proportion of positive anchors in a mini-batch during training
            of the RPN
 
        rpn_score_thresh (float): only return proposals with an objectness score greater than rpn_score_thresh
 
        box_roi_pool (MultiScaleRoIAlign): the module which crops and resizes the feature maps in
            the locations indicated by the bounding boxes
 
        box_head (nn.Module): module that takes the cropped feature maps as input
 
        box_predictor (nn.Module): module that takes the output of box_head and returns the
            classification logits and box regression deltas.
 
        box_score_thresh (float): during inference, only return proposals with a classification score
            greater than box_score_thresh
 
        box_nms_thresh (float): NMS threshold for the prediction head. Used during inference
 
        box_detections_per_img (int): maximum number of detections per image, for all classes.
 
        box_fg_iou_thresh (float): minimum IoU between the proposals and the GT box so that they can be
            considered as positive during training of the classification head
 
        box_bg_iou_thresh (float): maximum IoU between the proposals and the GT box so that they can be
            considered as negative during training of the classification head
 
        box_batch_size_per_image (int): number of proposals that are sampled during training of the
            classification head
 
        box_positive_fraction (float): proportion of positive proposals in a mini-batch during training
            of the classification head
 
        bbox_reg_weights (Tuple[float, float, float, float]): weights for the encoding/decoding of the
            bounding boxes


위의 gpt 해석본이다.


  • backbone (nn.Module): 모델의 특징을 계산하는 데 사용되는 네트워크입니다. 각 특징 맵(feature map)의 출력 채널 수를 나타내는 out_channels 속성을 포함해야 합니다(모든 특징 맵에 대해 동일해야 합니다). backbone은 하나의 텐서(Tensor) 또는 OrderedDict[Tensor]를 반환해야 합니다.
  • num_classes (int): 모델의 출력 클래스 수(배경 포함)입니다. box_predictor가 지정된 경우 num_classes는 None이어야 합니다.
  • min_size (int): 백본에 전달되기 전에 이미지의 크기를 조정할 최소 크기입니다.
  • max_size (int): 백본에 전달되기 전에 이미지의 크기를 조정할 최대 크기입니다.
  • image_mean (Tuple[float, float, float]): 입력 정규화에 사용되는 평균값입니다. 일반적으로 백본이 훈련된 데이터셋의 평균값입니다.
  • image_std (Tuple[float, float, float]): 입력 정규화에 사용되는 표준 편차 값입니다. 일반적으로 백본이 훈련된 데이터셋의 표준 편차 값입니다.
  • rpn_anchor_generator (AnchorGenerator): 특징 맵 집합에 대한 앵커를 생성하는 모듈입니다.
  • rpn_head (nn.Module): RPN에서 객체성(objectness) 및 회귀 델타를 계산하는 모듈입니다.
  • rpn_pre_nms_top_n_train (int): 훈련 중 NMS를 적용하기 전에 유지할 제안서 수입니다.
  • rpn_pre_nms_top_n_test (int): 테스트 중 NMS를 적용하기 전에 유지할 제안서 수입니다.
  • rpn_post_nms_top_n_train (int): 훈련 중 NMS를 적용한 후 유지할 제안서 수입니다.
  • rpn_post_nms_top_n_test (int): 테스트 중 NMS를 적용한 후 유지할 제안서 수입니다.
  • rpn_nms_thresh (float): RPN 제안서 후처리에 사용되는 NMS 임계값입니다.
  • rpn_fg_iou_thresh (float): RPN 훈련 중 앵커와 GT 박스 간의 최소 IoU 값으로, 이를 초과해야 양성으로 간주됩니다.
  • rpn_bg_iou_thresh (float): RPN 훈련 중 앵커와 GT 박스 간의 최대 IoU 값으로, 이를 초과하지 않아야 음성으로 간주됩니다.
  • rpn_batch_size_per_image (int): RPN 손실을 계산하기 위해 RPN 훈련 중 샘플링되는 앵커 수입니다.
  • rpn_positive_fraction (float): RPN 훈련 중 미니 배치에서 양성 앵커의 비율입니다.
  • rpn_score_thresh (float): 객체성 점수가 rpn_score_thresh보다 큰 제안서만 반환됩니다.
  • box_roi_pool (MultiScaleRoIAlign): 바운딩 박스가 표시된 위치에서 특징 맵을 잘라내고 크기를 조정하는 모듈입니다.
  • box_head (nn.Module): 잘라낸 특징 맵을 입력으로 받는 모듈입니다.
  • box_predictor (nn.Module): box_head의 출력을 받아 분류 로짓(logits)과 박스 회귀 델타를 반환하는 모듈입니다.
  • box_score_thresh (float): 추론 중에 분류 점수가 box_score_thresh보다 큰 제안서만 반환됩니다.
  • box_nms_thresh (float): 예측 헤드의 NMS 임계값입니다. 추론 중에 사용됩니다.
  • box_detections_per_img (int): 모든 클래스에 대해 이미지당 최대 감지 수입니다.
  • box_fg_iou_thresh (float): 분류 헤드 훈련 중 제안서와 GT 박스 간의 최소 IoU 값으로, 이를 초과해야 양성으로 간주됩니다.
  • box_bg_iou_thresh (float): 분류 헤드 훈련 중 제안서와 GT 박스 간의 최대 IoU 값으로, 이를 초과하지 않아야 음성으로 간주됩니다.
  • box_batch_size_per_image (int): 분류 헤드 훈련 중 샘플링되는 제안서 수입니다.
  • box_positive_fraction (float): 분류 헤드 훈련 중 미니 배치에서 양성 제안서의 비율입니다.
  • bbox_reg_weights (Tuple[float, float, float, float]): 바운딩 박스의 인코딩/디코딩에 사용되는 가중치입니다.


백본의 경우, 평소에도 사용하던 CNN 을 가져온다. 

image 로 (640, 480) 의 rgb 이미지가 있다고 하면, (640, 480, 3)의 이미지 차원을 가지게 된다.

이걸 예시로 Conv2d : kernel = 3, stride = 2, padding = 1, output_channel = 32 를 적용하게 되면

width_new = ((width_old - kernel + 2 * padding) / stride) + 1, 버림 적용

height 에 대해서도 마찬가지이다.


(640, 480, 3) --> (320, 240, 32) 가 된다.

여기에 배치 정규화라던가 activation 함수를 사용한다던가 해서 백본을 구성한다.

내가 궁금한건 이 백본 부분이 아니므로 넘어가도록 한다.


그럼 anchor, rpn, roi 를 한 번 살펴보도록 한다.

rpn = RegionProposalNetwork(
    rpn_anchor_generator,
    rpn_head,
    rpn_fg_iou_thresh,
    rpn_bg_iou_thresh,
    rpn_batch_size_per_image,
    rpn_positive_fraction,
    rpn_pre_nms_top_n,
    rpn_post_nms_top_n,
    rpn_nms_thresh,
    score_thresh=rpn_score_thresh,
)


rpn 은 RegionProposalNetwork 클래스에 인자를 넘겨주는 식으로 생성한다.

rpn_anchor_generator 는 아까도 봤었던 anchor generator 에서 생성한다.


anchor_utils.py 내의 AnchorGenerator class

class AnchorGenerator(nn.Module):
    """
    Module that generates anchors for a set of feature maps and
    image sizes.

    The module support computing anchors at multiple sizes and aspect ratios
    per feature map. This module assumes aspect ratio = height / width for
    each anchor.

    sizes and aspect_ratios should have the same number of elements, and it should
    correspond to the number of feature maps.

    sizes[i] and aspect_ratios[i] can have an arbitrary number of elements,
    and AnchorGenerator will output a set of sizes[i] * aspect_ratios[i] anchors
    per spatial location for feature map i.

    Args:
        sizes (Tuple[Tuple[int]]):
        aspect_ratios (Tuple[Tuple[float]]):
    """

    __annotations__ = {
        "cell_anchors": List[torch.Tensor],
    }

    def __init__(
        self,
        sizes=((128, 256, 512),),
        aspect_ratios=((0.5, 1.0, 2.0),),
    ):
        super().__init__()

        if not isinstance(sizes[0], (list, tuple)):
            # TODO change this
            sizes = tuple((s,) for s in sizes)
        if not isinstance(aspect_ratios[0], (list, tuple)):
            aspect_ratios = (aspect_ratios,) * len(sizes)

        self.sizes = sizes
        self.aspect_ratios = aspect_ratios
        self.cell_anchors = [
            self.generate_anchors(size, aspect_ratio) for size, aspect_ratio in zip(sizes, aspect_ratios)
        ]

    # TODO: https://github.com/pytorch/pytorch/issues/26792
    # For every (aspect_ratios, scales) combination, output a zero-centered anchor with those values.
    # (scales, aspect_ratios) are usually an element of zip(self.scales, self.aspect_ratios)
    # This method assumes aspect ratio = height / width for an anchor.
    def generate_anchors(
        self,
        scales: List[int],
        aspect_ratios: List[float],
        dtype: torch.dtype = torch.float32,
        device: torch.device = torch.device("cpu"),
    ) -> Tensor:
        scales = torch.as_tensor(scales, dtype=dtype, device=device)
        aspect_ratios = torch.as_tensor(aspect_ratios, dtype=dtype, device=device)
        h_ratios = torch.sqrt(aspect_ratios)
        w_ratios = 1 / h_ratios

        ws = (w_ratios[:, None] * scales[None, :]).view(-1)
        hs = (h_ratios[:, None] * scales[None, :]).view(-1)

        base_anchors = torch.stack([-ws, -hs, ws, hs], dim=1) / 2
        return base_anchors.round()

    def set_cell_anchors(self, dtype: torch.dtype, device: torch.device):
        self.cell_anchors = [cell_anchor.to(dtype=dtype, device=device) for cell_anchor in self.cell_anchors]

    def num_anchors_per_location(self) -> List[int]:
        return [len(s) * len(a) for s, a in zip(self.sizes, self.aspect_ratios)]

    # For every combination of (a, (g, s), i) in (self.cell_anchors, zip(grid_sizes, strides), 0:2),
    # output g[i] anchors that are s[i] distance apart in direction i, with the same dimensions as a.
    def grid_anchors(self, grid_sizes: List[List[int]], strides: List[List[Tensor]]) -> List[Tensor]:
        anchors = []
        cell_anchors = self.cell_anchors
        torch._assert(cell_anchors is not None, "cell_anchors should not be None")
        torch._assert(
            len(grid_sizes) == len(strides) == len(cell_anchors),
            "Anchors should be Tuple[Tuple[int]] because each feature "
            "map could potentially have different sizes and aspect ratios. "
            "There needs to be a match between the number of "
            "feature maps passed and the number of sizes / aspect ratios specified.",
        )

        for size, stride, base_anchors in zip(grid_sizes, strides, cell_anchors):
            grid_height, grid_width = size
            stride_height, stride_width = stride
            device = base_anchors.device

            # For output anchor, compute [x_center, y_center, x_center, y_center]
            shifts_x = torch.arange(0, grid_width, dtype=torch.int32, device=device) * stride_width
            shifts_y = torch.arange(0, grid_height, dtype=torch.int32, device=device) * stride_height
            shift_y, shift_x = torch.meshgrid(shifts_y, shifts_x, indexing="ij")
            shift_x = shift_x.reshape(-1)
            shift_y = shift_y.reshape(-1)
            shifts = torch.stack((shift_x, shift_y, shift_x, shift_y), dim=1)

            # For every (base anchor, output anchor) pair,
            # offset each zero-centered base anchor by the center of the output anchor.
            anchors.append((shifts.view(-1, 1, 4) + base_anchors.view(1, -1, 4)).reshape(-1, 4))

        return anchors

    def forward(self, image_list: ImageList, feature_maps: List[Tensor]) -> List[Tensor]:
        grid_sizes = [feature_map.shape[-2:] for feature_map in feature_maps]
        image_size = image_list.tensors.shape[-2:]
        dtype, device = feature_maps[0].dtype, feature_maps[0].device
        strides = [
            [
                torch.empty((), dtype=torch.int64, device=device).fill_(image_size[0] // g[0]),
                torch.empty((), dtype=torch.int64, device=device).fill_(image_size[1] // g[1]),
            ]
            for g in grid_sizes
        ]
        self.set_cell_anchors(dtype, device)
        anchors_over_all_feature_maps = self.grid_anchors(grid_sizes, strides)
        anchors: List[List[torch.Tensor]] = []
        for _ in range(len(image_list.image_sizes)):
            anchors_in_image = [anchors_per_feature_map for anchors_per_feature_map in anchors_over_all_feature_maps]
            anchors.append(anchors_in_image)
        anchors = [torch.cat(anchors_per_image) for anchors_per_image in anchors]
        return anchors


인자로는 size, ratio 를 가진다. init 부분을 보게 되면

self.sizes = sizes
 self.aspect_ratios = aspect_ratios
 self.cell_anchors = [
       self.generate_anchors(size, aspect_ratio) for size, aspect_ratio in zip(sizes, aspect_ratios)
 ]


이 부분에서 cell_anchors 를 생성하는 것을 볼 수 있다. 


forward 부분을 본다.


    def forward(self, image_list: ImageList, feature_maps: List[Tensor]) -> List[Tensor]:
        grid_sizes = [feature_map.shape[-2:] for feature_map in feature_maps]
        image_size = image_list.tensors.shape[-2:]
        dtype, device = feature_maps[0].dtype, feature_maps[0].device
        strides = [
            [
                torch.empty((), dtype=torch.int64, device=device).fill_(image_size[0] // g[0]),
                torch.empty((), dtype=torch.int64, device=device).fill_(image_size[1] // g[1]),
            ]
            for g in grid_sizes
        ]
        self.set_cell_anchors(dtype, device)
        anchors_over_all_feature_maps = self.grid_anchors(grid_sizes, strides)
        anchors: List[List[torch.Tensor]] = []
        for _ in range(len(image_list.image_sizes)):
            anchors_in_image = [anchors_per_feature_map for anchors_per_feature_map in anchors_over_all_feature_maps]
            anchors.append(anchors_in_image)
        anchors = [torch.cat(anchors_per_image) for anchors_per_image in anchors]
        return anchors


일단 어디서 가져왔는지는 모르겠지만 image list 와 feature map 을 받아온다.

.image_list 파일에서 받아오는 것으로 보이는데, 간단해서 한 번 짚고 넘어간다.


class ImageList:
    """
    Structure that holds a list of images (of possibly
    varying sizes) as a single tensor.
    This works by padding the images to the same size,
    and storing in a field the original sizes of each image

    Args:
        tensors (tensor): Tensor containing images.
        image_sizes (list[tuple[int, int]]): List of Tuples each containing size of images.
    """

    def __init__(self, tensors: Tensor, image_sizes: List[Tuple[int, int]]) -> None:
        self.tensors = tensors
        self.image_sizes = image_sizes

    def to(self, device: torch.device) -> "ImageList":
        cast_tensor = self.tensors.to(device)
        return ImageList(cast_tensor, self.image_sizes)


이 친구는 동일한 크기로 패딩되어 있는 이미지들을 담은 텐서값을 받고, 원본 이미지의 크기를 담고 있는 리스트를 가진다.

그리고 그래픽카드 사용 시 데이터를 넘겨주기 위해 to 메서드가 있는 모습이다.


다시 forward 부분으로 돌아와서,

feature_maps 는 어디서 가져온 건지는 잘 모르겠다.

        grid_sizes = [feature_map.shape[-2:] for feature_map in feature_maps]
        image_size = image_list.tensors.shape[-2:]

받아온 feature maps 중 각 feature map 의 size 를 grid_size 로 저장,

입력 이미지 크기를 image_size 로 저장한다.


        strides = [
            [
                torch.empty((), dtype=torch.int64, device=device).fill_(image_size[0] // g[0]),
                torch.empty((), dtype=torch.int64, device=device).fill_(image_size[1] // g[1]),
            ]
            for g in grid_sizes
        ]

stride 는 grid_size 에서 너비, 높이를 받아와서 각각 지정한다.


이후 set_cell_anchors 메서드를 실행하는데, 

    def set_cell_anchors(self, dtype: torch.dtype, device: torch.device):
        self.cell_anchors = [cell_anchor.to(dtype=dtype, device=device) for cell_anchor in self.cell_anchors]

아까 size, ratio 를 지정했던 cell_anchors 를 연산 기기를 다시 지정하는 메서드이다.


        anchors_over_all_feature_maps = self.grid_anchors(grid_sizes, strides)

모든 feature map들의 앵커를 지정하는 변수를 하나 선언한다. grid_anchors 라는 메서드를 활용하고, grid size 와 stride parameter 를 넘겨준다.


    def grid_anchors(self, grid_sizes: List[List[int]], strides: List[List[Tensor]]) -> List[Tensor]:
        anchors = []
        cell_anchors = self.cell_anchors
        torch._assert(cell_anchors is not None, "cell_anchors should not be None")
        torch._assert(
            len(grid_sizes) == len(strides) == len(cell_anchors),
            "Anchors should be Tuple[Tuple[int]] because each feature "
            "map could potentially have different sizes and aspect ratios. "
            "There needs to be a match between the number of "
            "feature maps passed and the number of sizes / aspect ratios specified.",
        )

        for size, stride, base_anchors in zip(grid_sizes, strides, cell_anchors):
            grid_height, grid_width = size
            stride_height, stride_width = stride
            device = base_anchors.device

            # For output anchor, compute [x_center, y_center, x_center, y_center]
            shifts_x = torch.arange(0, grid_width, dtype=torch.int32, device=device) * stride_width
            shifts_y = torch.arange(0, grid_height, dtype=torch.int32, device=device) * stride_height
            shift_y, shift_x = torch.meshgrid(shifts_y, shifts_x, indexing="ij")
            shift_x = shift_x.reshape(-1)
            shift_y = shift_y.reshape(-1)
            shifts = torch.stack((shift_x, shift_y, shift_x, shift_y), dim=1)

            # For every (base anchor, output anchor) pair,
            # offset each zero-centered base anchor by the center of the output anchor.
            anchors.append((shifts.view(-1, 1, 4) + base_anchors.view(1, -1, 4)).reshape(-1, 4))

        return anchors


처음에 cell_anchors 이 비었는지(존재하는지), grid size, stride, cell_anchors 의 길이가 모두 같은지 검사를 한번 한다.

이후 iterable 하게 만들기 위해 zip() 을 사용한다.

grid 의 크기, stride 크기, 연산을 할 device 를 각각 할당해 준다.

torch.arange(start, end, dtype, device) 를 이용해서 시작부터 끝까지 정수 시퀀스를 생성한다.

meshgrid : x축과 y축의 모든 조합을 생성

reshape(-1) --> 1차원으로 내림

shifts : x,y 좌표를 [shift_x, shift_y, shift_x, shift_y) 형태로 스택

anchors.append : 기본 앵커를 시프트된 위치로 이동시켜 최종 앵커 생성

예를 들어 base anchor 의 위치 : [25, 50, 50, 100]

shifts = [30, 20, 30, 20]

최종 앵커의 위치 = [55, 70, 80, 120]

이것을 반복

그리고 최종 앵커의 위치를 반환한다.  결론은 stride 를 참고해 base anchor 의 위치 변경


다시 forward 메서드로 돌아오면 anchor 를 저장하기 위해 함수들이 있다.

anchors: List[List[torch.Tensor]] = []


for _ in range(len(image_list.image_sizes)):
            anchors_in_image = [anchors_per_feature_map for anchors_per_feature_map in anchors_over_all_feature_maps]
            anchors.append(anchors_in_image)
        anchors = [torch.cat(anchors_per_image) for anchors_per_image in anchors]
        return anchors


image size 길이 만큼 반복을 한다.

anchors_in_image 는 아까 찾아냈던 앵커들을 anchors_in_image 에 다시 복사한다.

그리고 anchors 변수에 추가한다.

그리고 각 이미지에 대한 앵커를 하나의 텐서로 concatenate 한다.


반응형
반응형

Forward liveness analysis.

1. 위의 식을 기억하고 넘어감.

2. in[n] 먼저 하고 out[n] 진행


이런 명령어를 가진 그래프가 있다고 하자.


3. 초기 상태는 다음과 같다.


4. 공식에 넣기 위해 use, def 를 구한다.

use 는 명령어에서 보통 사용되는 변수 집합이라고 생각하면 되고

def 는 정의되는(값이 변하는) 변수라고 생각하면 된다.


5. 갱신

in[n] 먼저 구하는데, in[n] 은 use[n] U (out[n] - def[n]) 이다.

이후 out[n] 을 구하는데, out[n] 은 successor의 in 을 가져온다.


1st

명령어 1번 : in, out이 모두 공집합 상태이고, def 를 빼도 아무것도 남지 않는다.

in[1] = {}

out[1] =  in[2] = {}

이렇게 명령어 하나 지날 때 마다 업데이트 되는 개념임.


명령어 2번 

in[2] = {a} U ({} - {b}) = {a}

out[2] = in[3] = {}


명령어 3번 

in[3] = {bc} U ({} - {c}) = {bc}        -> {} - {c} = {}

out[3] = in[4] = {}


명령어 4번 

in[4] = {b} U ({} - {a}) = {b}

out[4] = in[5] = {}


명령어 5번 

in[5] = {a} U ({} - {}) = {a}

out[5] = in[2] U in[6] = {a} U {} = {a}

여기는 분기가 나뉘어 있어서, 현재까지 들어온 값에서 처리함.

1번 사이클에서 명렁어 2번에 의해 in[2] 가 이미 최신화되었기 때문에 그 값을 사용한다는 의미


명령어 6번

in[6] = {c} U ({} - {}) = {c}

out[6] = {}, 연결 X


1번 사이클을 지난 후 값 (inst# in/out)

inst1 : {} / {}

inst2 : {a} / {}

inst3 : {bc} / {}

inst4 : {b} / {}

inst5 : {a} / {a}

inst6 : {c} / {}

표의 1번째 사이클과 같은 것을 확인 가능함.

이것을 더 이상 최신화 되지 않을 때 까지 수행 (previous sets == current sets)


Backward liveness analysis.


1. 마찬가지로 위의 식을 기억하고 넘어감.

2. out[n] 을 먼저 계산하고 in[n] 을 계산한다.


이런 명령어를 가진 그래프가 있다고 하자. (Forward 와 동일)


3. 초기 상태는 다음과 같다. (Forward 와 동일)


4. 공식에 넣기 위해 use, def 를 구한다. (Forward 와 동일)


5. 1차 갱신

successor 를 파악해야 하므로 가장 끝 노드에서부터 처리를 시작한다.(backward 는 6번부터 1번으로 감)

out - in - out - in - ... 순서로 처리를 한다.


6. 2차 갱신


값이 변할 때 까지 업데이트


8. 최종 결과


반응형
반응형

모듈은 써 보고 싶은데 정보가 많지 않아서 글을 한 번 작성해 본다.


먼저, TF-LC02 LiDAR 모듈을 사용한다.


나는 Aliexpress 에서 개인 프로젝트 용으로 모듈을 구매하였다.


TF-LC02 ToF 레이저 라이더 거리 측정 센서 모듈, 통신 인터페이스, UART TDC VCSEL, Rang Robotics 스마트 홈, 940nm - AliExpress 502


6904.0₩ 25% OFF|TF LC02 ToF 레이저 라이더 거리 측정 센서 모듈, 통신 인터페이스, UART TDC VCSEL, Rang Robo

Smarter Shopping, Better Living! Aliexpress.com

ko.aliexpress.com


저렇게 생긴 모듈을 구매하였다. 앞서 말하는데, 나는 TTL to USB 케이블(정품) 을 사용할 수 있는 환경이다.


USB to TTL Serial Cable / 디바이스마트 (devicemart.co.kr)


USB to TTL Serial Cable

PL2303TA(PL2303HX) 칩셋을 이용한 USB to TTl 컨버터

www.devicemart.co.kr

정품이 아닌 버전은 최신 윈도우에서 포트에 자동으로 잡히지 않고 알 수 없는 장치라고 뜨는 이슈가 있다는데, 나는 이거까지는 잘 모르겠다.


기본적인 유저 가이드, 데이터시트는 다음과 같다.


TF-LC02 [BXDPTFLC0201] (youyeetoo.com)


사이트에 들어가게 되면 파일들이 존재한다.


유저 가이드의 경우 굉장히 간단한데 있을 것은 다 있다.


참고 코드는 해당 사이트의 아두이노 코드를 사용했다.

Benewake(北醒) TF-LC02 (TTL) 雷达使用TTL转USB转接板在Arduino Uno上的运用-CSDN博客


Benewake(北醒) TF-LC02 (TTL) 雷达使用TTL转USB转接板在Arduino Uno上的运用-CSDN博客

前言 本例程仅用作参考 Benewake(北醒) TF-LC02产品简要说明 性能参数 产品图片及尺寸 Arduino开发板介绍 参考链接:常用Arduino板介绍 Benewake(北醒) TF-LC02 接口及通讯协议说明 接口定义 串口协议说明

blog.csdn.net


연결은 다음과 같이 한다.


TF-LC02 는 다음 그림과 같은 구조를 가진다. 기본적으로 이 구조를 따르되, 조금 변경을 할 예정이다.

변경한 그림은 다음과 같다.

TTL to USB 로 들어가는 RX 단에 TF-LC02 의 TX 를 물려주는 것만 바꿨다. 직접 TX hex 값을 받아온다.


구조는 알아보기 힘들지만 이렇게 생겼다.


빨간색 부터 VCC, 검은색 GND, ...


그런데 TF-LC02 는 선이 짧게 오고, 이게 가장 큰 문제가 뭐냐면, 끝이 갈라진다.


갈라지는 케이블이라, 형태가 유지 되게끔 납을 살짝 칠해 주거나, 남는 아두이노 점퍼 케이블 헤더부분을 납땜해 사용해서 붙여야 한다.


아두이노 점퍼케이블


BasicReading.ino
0.00MB


python 코드는 다음과 같다. (일반적인 테스트 용이다.)


import serial # pip install pyserial
import binascii # pip install binascii

try:
    # Change Serial('COM Port to your environment')
    ser = serial.Serial('COM5', 115200)
except serial.SerialException as e:
    print(f"Error opening serial port: {e}")
    exit(1)

while True:
    if ser.readable():
        s = ser.read(1)  # Reading 1 byte at a time
        hex_string = binascii.hexlify(s).decode('utf-8')
        print(hex_string, end=" ")
        if hex_string == 'fa':
            print("\n")


Python 코드의 결과로 위 사진과 같은 hex 배열을 얻게 된다.

0x55 0xAA 는 헤더고, 0xFA 는 end sign 이다. 데이터시트를 보면 예시도 있으므로 참고하면 되겠다.


예시를 한 번 보자.


현재 아두이노 코드는 command 를 measuring distance 하나만 보내고 있다.

0x0155 가 왜 341이 나올까? 이는 hex 값이기 때문이다.

0 * 16^3 + 1 * 16^2 + 5 * 16^1 + 5 = 256 + 80 + 5 = 341 (단위 mm)

detect 되는 거리는 3cm ~ 2m 까지이기 때문에 최대 2000 mm 까지 감지 가능하다.


참고) 2000 은 0x07D0

참고) 앞에 나왔던 55 AA 81 03 에서 03 은 다음과 같음

03은 뒤에 나오는 parameter 길이


그럼 길이를 한번 다시 재본다.

코드는 다음과 같다.


import serial  # pip install pyserial
import binascii  # pip install binascii

idx = 0
distance = 0

try:
    # Change Serial('COM Port to your environment')
    ser = serial.Serial('COM5', 115200)
except serial.SerialException as e:
    print(f"Error opening serial port: {e}")
    exit(1)

while True:
    if ser.readable():
        s = ser.read(1)  # Reading 1 byte at a time
        hex_string = binascii.hexlify(s).decode('utf-8')

        if idx == 4 or idx == 5:
            # Append incoming hex values and convert to decimal
            if idx == 4:
                distance = int(hex_string, 16) << 8  # Shift left by 8 bits for the high byte
            elif idx == 5:
                distance += int(hex_string, 16)  # Add the low byte value
                print(f"Distance: {distance} mm")  # Print the distance

        if idx == 6 and hex_string != '00':
            print("WARNING: Out of range!")
        # Index increment
        idx += 1
        
        if hex_string == 'fa':
            # Reset packet on end signal
            idx = 0
            distance = 0
            print("\n")


정상적으로 출력되는 것을 볼 수 있다.

time.sleep() 을 사용해서 딜레이도 줘 봤는데, UART 통신이 뭔가 이상해져서 다시 뺐다.


반응형
반응형

딥러닝을 한 번이라도 맛본 사람이라면, 

이미지가 텐서 라는 형태로 변환되고 처리가 이루어진다는 것은 자명한 사실이다.


그럼 이 텐서라는 형태에서 다시 이미지 파일로 형태를 바꾸려면, 어떻게 해야 할까?


보기 쉬운 이미지를 위해, 그림판으로 28x28 사이즈의 이미지를 하나 색칠했다.


회색 부분은 #999999 이고, 줄이 쳐진 부분은 #555595 이다.


대충 이미지 하나를 생성했다. (28x28x3) 


그럼 이 이미지를 이제 텐서 형태로 변환한다.


image_path 는 알아서 잘 지정하자. 절대경로로 하면 편하다.


값을 알아보기 위함이므로 normalize 는 진행하지 않는다.


출력은 넘파이 배열로 출력한다.

from PIL import Image
import torchvision.transforms as transforms
import torch

image_path = "img.png"
image = Image.open(image_path)

transform = transforms.Compose([
    transforms.Resize((28, 28)),
    transforms.ToTensor()
])

image_tensor = transform(image)
image_tensor = image_tensor.unsqueeze(0)

tensor_values = image_tensor.numpy()

with open("tensor_values.txt", "w") as f:
    for layer in tensor_values:
        for row in layer:
            for value in row:
                f.write(f"{value} ")
            f.write("\n")
        f.write("\n")


tensor_value.txt


텍스트 파일을 보면 알 수 있는 점이 있다.


다시 그림을 한 번 보자.


보면 오른쪽으로 1픽셀 정도 치우쳐져 있는 그림이다.

값을 한 번 보자.


0.33 .. 값은 첫 번째를 1번이라고 했을 때 14번부터 16번의 값을 가진다!

28x28 의 정 중앙이 14 라는 점을 보았을 때, 딱 1픽셀 밀려 있는 것을 확인 가능하다.


이번에는 

0.33 ... 값이 가득한 부분을 한 번 본다.


위에서 부터 1번 row 라고 했을 때 7번에 위치한다.


잘 보면 첫 번째만 값이 이상한데, 이는 의도된 그림이다. 그림을 다시 보면 가장 처음 픽셀만 살짝 연한 것을 볼 수 있다.


따라서, 이 정보들을 보면, 텐서는 


저 방향으로 하나의 row 를 끝날 때까지 읽고, 끝나면 다음 row를 출력한다고 보면 되겠다.


그리고 총 형태를 보면,


이다. 우리가 지금까지 봤었던 것은 한 차원의 값이다. 아마 RGB 중 R 값을 본 것 같다.


이는 B의 0.33 ... 값을 보면 더 잘 알 수 있다.


이쪽 부분만 0.58431375 로 값이 같은 것을 알 수 있다.


처음에 값 지정할 때 #555595 로 설정했기 때문에 혼자만 다르게 나오는 것을 볼 수 있다.


커널이 있으면 위 사진처럼 계산도 가능하겠다.


이제 다시 넘파이 배열를 이미지로 변환해 볼 차례이다.


하나 예시를 들어보면, #999999의 RGB 값은 (153, 153, 153) 이다.

153 을 RGB 범위인 255로 나누게 되면 0.6 이라는 값이 나오게 된다.


#555595 는 어떨까? (85, 85, 149) 의 값을 가진다.

85를 RGB 범위인 255로 나누게 되면 0.33333... 의 값이 나온다.

컴퓨터에서는 32비트 범위에서 잘리게 되므로 약간의 소수점 변동이 생길 수 있다.

텐서의 경우 0.33333334 의 값을 가지게 되었다.


149를 255로 나눠보면? 

0.5843137254 ... 값이 나온다. 이도 소수점 7번째 자리까지 동일한 값이 나오는 것을 확인 가능하다.


다르게 생각해 보면 R 채널에서는 회색 범위는 153의 값을 가지고, 보라색 범위는 85의 값을 가지는 텐서들로 이루어져 있다.


G 채널에서도 같다.


B 채널에서만 회색 범위가 153이라는 값을 가지고, 보라색 범위가 149의 값을 가지게 된다. 그래서 값 차이가 크게 나지 않는다.


아무튼 다시 이미지로 변경을 한다.


import torchvision.transforms as transforms
import torch
from PIL import Image

# Load the image
image_path = "./img.png"
image = Image.open(image_path)

# Define the transformation
transform = transforms.Compose([
    transforms.ToTensor()
])

# Convert the image to a tensor
image_tensor = transform(image)

print(image_tensor.shape)

tf = transforms.ToPILImage()(image_tensor).show()


변형한 것이 없기 때문에 깔끔하게 다시 나온다.


이건 기존에 했던 이미지 - > 바이트 배열 -> 텐서 -> 넘파이 배열 -> 텐서 -> 이미지 변환이다.


from PIL import Image
import torchvision.transforms as transforms
import torch
import numpy as np

# 이미지 불러오기
image_path = "./img.png"
image = Image.open(image_path)

# 이미지 전처리
transform = transforms.Compose([
    transforms.Resize((28, 28)),  # 모델의 입력 크기로 리사이즈
    transforms.ToTensor()  # 텐서로 변환
])

image_tensor = transform(image)  # 텐서 변환
image_tensor = image_tensor.unsqueeze(0)  # 배치 차원 추가

# 텐서를 바이트 값으로 변환하여 바이트 파일로 저장
tensor_bytes = image_tensor.numpy().tobytes()  # 텐서를 numpy 배열로 변환 후 바이트로 변환

# 바이트 파일 저장
with open("D:/tensor_values.bytes", "wb") as f:
    f.write(tensor_bytes)

# 바이트 파일을 읽어 텐서로 변환
with open("D:/tensor_values.bytes", "rb") as f:
    tensor_bytes = f.read()

# 바이트 데이터를 numpy 배열로 변환
tensor_array = np.frombuffer(tensor_bytes, dtype=np.float32)
tensor_array = tensor_array.reshape((1, 3, 28, 28))  # 원래 텐서의 형태로 변환

# numpy 배열을 텐서로 변환
reconstructed_tensor = torch.tensor(tensor_array)

# 텐서를 이미지로 변환
reconstructed_image = transforms.ToPILImage()(reconstructed_tensor.squeeze(0))

# 이미지 저장
reconstructed_image.save("D:/reconstructed_image.jpg")


이미지에 잡음이 좀 생긴 것을 확인할 수 있었다.


반응형
반응형

GPT 의 힘을 빌려서 완성했다.

command 창 내 현재 위치에 파일이 생성되니 주의할 것.

import torch
from ultralytics import YOLO

# ------------ 모델 경로 및 파일 수정 시간은 수정하기 --------------
model_path = '../best.pt' 
model_generated_time = "  24-06-04, 20:02"
# --------------------------------------------------------------

model = YOLO(model_path)

# 모델의 가중치 확인
model_weights = model.model.state_dict()
torch.set_printoptions(threshold=torch.inf)
idx = 0
while idx < len(model_weights):
    name = list(model_weights.keys())[idx]
    param = model_weights[name]
    if "model." in name:
        output_file = f"{name}.txt" 
        with open(output_file, "w") as f:
            f.write("Weights Information:\n")
            f.write("# weights ver.2\n\n")
            f.write(f"Model Path: {model_path}\n")
            f.write(f"Model Generated Time: {model_generated_time}\n\n")
            f.write(f"Layer: {name} | Size: {param.size()}\n")
            f.write(str(param) + "\n")  
    idx += 1


다음은 레이어 정보만 가져오는 코드임.


# 레이어 정보만 가져오기
import torch
from ultralytics import YOLO

# 모델 경로 및 파일 수정 시간 설정
model_path = '../best.pt' 
model_generated_time = "24-06-04, 20:02"

# YOLO 모델 로드
model = YOLO(model_path)

# 모델의 가중치 확인
model_weights = model.model.state_dict()

# 레이어 정보를 저장할 파일 생성
with open("layers.txt", "w") as f:
    f.write("Layer Information:\n")
    f.write(f"Model Path: {model_path}\n")
    f.write(f"Model Generated Time: {model_generated_time}\n\n")

# 각 레이어 정보를 파일에 기록
with open("layers.txt", "a") as f:
    for idx, (name, param) in enumerate(model_weights.items()):
        f.write(f"Layer {idx}:\n")
        f.write(f"Name: {name}\n")
        f.write(f"Size: {param.size()}\n")
반응형
반응형

알게 된 점 위주로 작성하는 개인적인 글


먼저 ultralytics 레포지토리를 클론한다.


GitHub - ultralytics/ultralytics: NEW - YOLOv8 🚀 in PyTorch > ONNX > OpenVINO > CoreML > TFLite


GitHub - ultralytics/ultralytics: NEW - YOLOv8 🚀 in PyTorch > ONNX > OpenVINO > CoreML > TFLite

NEW - YOLOv8 🚀 in PyTorch > ONNX > OpenVINO > CoreML > TFLite - ultralytics/ultralytics

github.com


커스텀 데이터셋을 받아오기 위해 pretrain 된 모델을 받아온다.(굳이 안해도 되긴 한다)

YOLOv8 - Ultralytics YOLO 문서


YOLOv8

Discover YOLOv8, the latest advancement in real-time object detection, optimizing performance with an array of pre-trained models for diverse tasks.

docs.ultralytics.com


모델은 YOLOv8(n~x) 까지 있는데, 원하는 것으로 다운받으면 된다.

parameter 가 많을수록 속도가 느리지만, 정확도가 상승한다.


나는 가장 가벼운 YOLOv8n 을 사용한다.


다운받은 YOLOv8n.pt 파일을 ultralytics 폴더 안에 넣는다.


커스텀 데이터셋을 만들기 위해 여러가지가 가능한데, 나는 이미지를 수동으로 라벨링하고 roboflow 사이트에서 yaml 파일을 생성하는 방법으로 해 보았다. 아마 roboflow 에서 자동으로도 지원하는 것 같다.


수동 라벨링 툴은 labelImg 를 사용하였다.


YOLO 이미지 라벨링을 위한 labelImg 사용법 (velog.io)


YOLO 이미지 라벨링을 위한 labelImg 사용법

labelImg를 이용해 YOLO 이미지 라벨링하기

velog.io


잘 정리된 글을 따라 가면 된다.


포맷을 pascalVOC 에서 YOLO 로 바꾸는 것을 까먹지 말자.


나는 커스텀 데이터셋으로 사과 사진을 사용하였다.


apple#.jpg 사진을 라벨링을 끝내고 난 파일들인데, 이를 roboflow 에 넣으면 커스텀 데이터셋을 만들어 준다.

모델을 따로 지정하지는 않고 export dataset 으로 데이터셋만 가져와 준다.


형식은 YOLOv8 로 지정하고 export 해 주면 위와 같이 파일들이 있다.


data.yaml 을 한 번 본다.


train: ../train/images
val: ../valid/images
test: ../test/images

nc: 1
names: ['15']

roboflow:
  workspace: hipensan
  project: apple-finder-ar2zu
  version: 1
  license: CC BY 4.0
  url: https://universe.roboflow.com/hipensan/apple-finder-ar2zu/dataset/1


names 에 '15' 라고 되어 있는데, 이를 객체 이름으로 바꿔준다. 나는 apple finder 를 사용하기 때문에 Apple 라고 붙여주도록 하겠다.


데이터셋을 준비했으니 모델에 학습시킬 차례이다.


ultralytics 폴더에 main.py 를 생성한다.

[main.py]

from ultralytics import YOLO

model = YOLO('yolov8n.pt')

model.train(data="../Apple Finder/data.yaml", epochs=20)


model.train 의 data 경로는 yaml 파일의 경로로 해 줘야 한다. 절대 경로로 하는게 정신건강에 이롭다.


코드 시작전 현재 command 창의 위치를 잘 확인하자. 현재 위치에 runs/.. 파일들이 생성된다.


+) 데이터셋이 있는 곳에서 실행시키는 것이 편할 수도 있다.


20에포크를 지나면 다음과 같이 내가 설정한 경로/runs/detect/train# 하위에 best.pt, last.pt 가 생성되었다.


학습시킨 best.pt의 내부 구조를 한번 본다.


경로 설정을 쉽게 하기 위해 ultralytics 폴더로 best.pt 파일을 복사해 온다.


from ultralytics import YOLO
import torch
# model = YOLO('yolov8n.pt')

# model.train(data="C:/Users/admin/Desktop/github/Apple Finder/data.yaml", epochs=20)

model = torch.load("./best.pt")
print(model)


레이어 0 ~ 레이어 22까지 내부 구조가 나오는 것을 확인 가능하다.


train 시켰으니 예측을 시켜 보는 것도 필요하겠다.


사과와 비슷해 보이는 복숭아, 자두, 사과 사진을 각각 준비한다.

아, 사진의 사이즈는 640*640이다. roboflow 를 사용하면 resize 도 지원한다.


+) 다시 위치 바꾸기 귀찮아서 데이터셋이 있는 위치에서 모두 진행하였다. best.pt 도 옮겼다.


파일구성은 위 사진과 같다.


코드는 다음과 같다. Predict - Ultralytics YOLO 문서 에서 제공해주는 코드에서 모델과 input image 만 바꿨다.

from ultralytics import YOLO

# Load a model
model = YOLO("best.pt")  # pretrained YOLOv8n model

# Run batched inference on a list of images
results = model(["peaches1.jpg", "peaches2.jpg", "peaches3.jpg", "plum1.jpg", "plum2.jpg"])  # return a list of Results objects

# Process results list
for result in results:
    boxes = result.boxes  # Boxes object for bounding box outputs
    masks = result.masks  # Masks object for segmentation masks outputs
    keypoints = result.keypoints  # Keypoints object for pose outputs
    probs = result.probs  # Probs object for classification outputs
    obb = result.obb  # Oriented boxes object for OBB outputs
    result.show()  # display to screen
    result.save(filename="result.jpg")  # save to disk


우리가 train 시킨 사과가 없으므로, no detection 이 뜨는 것이 당연하다. 

다른 사과 이미지를 한 번 넣어본다.

train 시킨 사과 이미지와 다르면 된다.


학습 데이터가 적어서? detect 되지 않는 문제가 발생한다.

val 데이터를 한 번 넣어본다.


* val 데이터, train 데이터도 제대로 출력되지 않는다(?)

* yolov8n 모델로 돌리면 제대로 나온다.


* 데이터 학습이 제대로 안 되었다는 소리


아무튼 yolov8n 모델로 돌려 보았다.

yolov8n.pt


test 데이터는 더 있는데, 학습되지 않은 자두와 복숭아에 대해서 사과와 구분을 잘 못하는 모습을 보였다.

그래서, 다른 모델을 적용시켜 보기로 했다.

small, medium, large 까지만 사용해 보기로 했다.


yolov8s.pt

small 도 이상하다.

coco dataset 에 복숭아와 자두가 없는게 문제가 큰 것 같다.


yolov8m.pt


yolov8l.pt


train 시키지 않은 항목에 대해서 이미 있는것을 바탕으로 추측하고, 사과와 비슷하게 생겼기 때문에 사과로 인지하는 것 같다. 해당 사진은 '자두' 이다.


커스텀 데이터셋을 다시 train 시킬 필요가 있겠다.


epoch 를 60으로 늘렸다. train 데이터도 제대로 검출이 안 되기 때문.

아니면 항목이 하나밖에 없어서 그럴 수도 있다.


last.pt (epochs=60)


best.pt (epochs=60)


last 와 best 가 동일한 결과를 보였다.

이제 사과 비슷한 모양은 비슷하게 검출되는 것을 확인 가능하다. (best.pt 사용했다.)


Full code 도 첨부하도록 하겠다.

필요한 대로 수정하면서 사용하도록 한다.

# --------------------------------------------------
# from ultralytics import YOLO
# model = YOLO('yolov8n.pt')
# model.train(data="C:/Users/admin/Desktop/github/Apple Finder/data.yaml", epochs=60)
# --------------------------------------------------

# from ultralytics import YOLO
# import torch

# model = torch.load("./best.pt")
# print(model)


#----------------------------------------------------
### image predict

from ultralytics import YOLO

# Load a model
model = YOLO("best.pt")  # pretrained YOLOv8n model

# Run batched inference on a list of images
# results = model(["app.jpg"])  # return a list of Results objects
results = model(["apple1.jpg",
                 "apple2.jpg",
                 "apple3.jpg",
                 "peaches1.jpg",
                 "peaches2.jpg",
                 "peaches3.jpg",
                 "plum1.jpg"])

# Process results list
for result in results:
    boxes = result.boxes  # Boxes object for bounding box outputs
    masks = result.masks  # Masks object for segmentation masks outputs
    keypoints = result.keypoints  # Keypoints object for pose outputs
    probs = result.probs  # Probs object for classification outputs
    obb = result.obb  # Oriented boxes object for OBB outputs
    result.show()  # display to screen
    result.save(filename="result.jpg")  # save to disk
#----------------------------------------------------------
반응형
반응형

취미로 빌드한 지 2년 정도가 지난, TES68을 한 번 청소해 봤다.


하우징? 으로 Nuphy 의 TES68 orange 를 사용했다.


스위치는 Aliexpress에서 공장윤활된 gateron yellow pro 스위치를 사용했고


키캡은 피카츄 XDA 프로파일 키캡을 사용하고 있다. 개인적으로 백스페이스가 흰 색이였으면 좋았을 것 같다.


스위치가 milky yellow 축이라고는 하는데 그냥 황축인 것 같다..


하우징은 Nuphy 공식 사이트에서 구매했다. 


최근에 다시 스위치 & 스테빌 간이윤활을 한 번 진행했는데, 확실히 스테빌 쪽은 소리가 조금 잡혔다. 전에는 철심 소리가 강하게 났었는데 그게 좀 줄어든 것 같다.


키보드를 강하게 누르는 편이라 소리가 좀 나는데, 그래도 한번 쯤 커스텀 빌드는 해 볼만한 것 같다.


타건 소리도 한 번 첨부해 봤다!..


다음에는 어떤 키보드를 만들어 볼 지 고민이 되는구만,,

반응형

+ Recent posts